
|
|
#971
 09-25-2015, 01:41 PM
|
|||
|
|||
|
Quote:
__________________
GasGas EC 250 2008 Equipped KYB SSS Fork. 
|

|
#972
02-04-2016, 06:52 AM
|
||||
|
||||
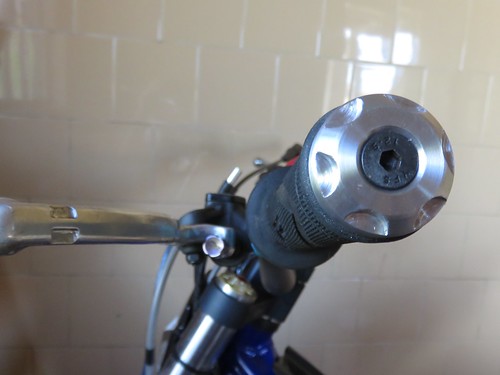 Have made a new bar end on a mini lathe
__________________
www.endurohp.eng.br Sherco ST300 2015 (Trials) https://www.instagram.com/leocm74/ Brasil!
|
|
#973
02-04-2016, 08:38 AM
|
|||
|
|||
|
Getting race bikes ready for the ACES enduro series! Super clean ico mount protected by flexx bars. New S3 cyl and head on team back up bike. Magura clutch and brembro front brakes complete the package.
|
|
#974
02-04-2016, 08:40 AM
|
|||
|
|||
|
Pic of ico mount
|
|
#975
02-05-2016, 06:46 AM
|
||||
|
||||
|
Last fall, I bought a '01 XC 200. I found myself wanting a light weight, easy to ride 2 stroke after having ridden a tough dual sport on my 450 4 stroke, that kicked my butt.
My first goal was to fix whatever was worn out or broken and having done that, I decided to do some other upgrade/repairs that weren't absolutely necessary, but I'm glad I did. The pipe, a FMF Gnarly, was looking pretty bad. Also, if it had to come off, as in when I did the top end, it was tweaked just enough that it was a bear to get back on. The old pipe.   Found this on Fleabay, NIB, $201.00 US, freight included.  The new pipe went on super easy compared to how I had to fight the old pipe to get it back on.  Next, was the clutch. It works well, but just had a little drag. Not a problem in most cases, but a PIA if you needed to restart in gear after stalling in an awkward spot on the trail. Laid the bike up against the workbench and pulled the clutch cover and pulled the clutch assembly, including the basket & hub. Found these notches worn in the clutch hub.  Found this oem clutch hub online, 94.00 US, freight included.  The basket had notches worn in it as well, but not too bad. I took the advice I read on this forum and files them smooth, being careful to remove no more than needed.   All other clutch parts looked good, so I took a chance on them. Clutch re-assembled, minus the pressure plate and clutch cover  Clutch works well now. Starts in gear and can find neutral easily. Have only test ridden on the County road, a better test ride will have to wait till the local trails dry out some. All in all, I think it was $300 bucks well spent. RB
|
|
#976
02-06-2016, 12:29 AM
|
||||
|
||||
|
Great job! It makes the time and money spent on a project more than worthwhile when everything works so good on your next ride.
I'm curious about what you are going to do with your old pipe. It's beat up and dented pretty badly, but it's not mangled or smashed flat.
__________________
Jim Cook Smackover Racing Team LAGNAF '11 Gas Gas EC250 (primary ride) '06 Gas Gas DE300 2004 Gas Gas TXT300 Pro '94 Husaberg FE350 '86 Yamaha IT200 '86 Honda TRL200 Reflex '04 KTM 525EXC (soon to be dual sported) Several others, including project bikes, Deb's bike, and a fleet of grandkids' bikes Let's go riding! http://www.jebruns.com/Wudi19/wudi19.html http://www.ahrma.org/schedules-results/cross-country/
|
|
#977
02-06-2016, 05:51 AM
|
||||
|
||||
|
Quote:
I've done a lot of fabricating and welding in my former life as a truck & equpment mechanic & owner. I've made up the plugs for the pipe already and I've got a cutting torch, so I'll give heating and pressurizing it a try, one of these days. A good rainy day project. RB
|
|
#978
02-06-2016, 08:31 PM
|
||||
|
||||
|
Quote:
It sounds like you are ready. What did you use for plugs? It took me twenty years to refine my set-up. During my initial experiments with my first version set-up, I shot a plug out of a Husky 430 pipe that went through my building's tin roof.  Some years later, while using a later generation homemade setup at the motorcycle shop, I shot a freeze plug all the way from my work area to the front display window, 100 feet away, when a bailing wire retainer broke. (If it hadn't hit the ceiling on the way, I think the freeze plug would have broken that picture window.  ) )Here's my latest generation set-up. It's worked well for me for the last 15 years. I took a 2" line pipe coupling (to slip over the header of the pipe) and near one end, drilled and threaded three 6mm equidistant holes to use the bolts for retainers, to catch behind the larger, flange part. I use an expandable rubber freeze plug for the header end stopper, and a 2" threaded flat plug to screw into the pipe coupling to hold the freeze plug tightly against the header. On the stinger end, I use a metal plumber's compression fitting that is sized to fit over and seal against the "stinger" of the pipe. I fitted a threaded schrader valve to a bushing, to a bell reducer, to a pipe nipple, and put it into the other end of the compression fitting. (tighten the compression fitting. For a thin wall pipe (Messico), I start with only 18 psi. For a heavy pipe like the FMF Gnarly, I start with between 35 & 40 psi. Wearing gloves and safety glasses, with the pipe in a vise and aired up, I use a rosebud tip to circle the dents and work toward the middle. I don't generally relieve any pressure on the pipe until I am finished, so the hotter the pipe gets and the longer I work, the quicker things happen. (I adjust what I'm doing accordingly.) Don't get carried away and take out the small factory dent that helps clearance with the right radiator. When I'm finished, I (now) always let off pressure at the Schrader valve before I start removing the compression fitting or the freeze plug. I never take off my safety glasses until I finish. I usually burn the spooge out the pipe before I start. It's amazing how much spooge can remain in a bike's pipe. Good Riding and Wrenching to You! Jim Cook
__________________
Jim Cook Smackover Racing Team LAGNAF '11 Gas Gas EC250 (primary ride) '06 Gas Gas DE300 2004 Gas Gas TXT300 Pro '94 Husaberg FE350 '86 Yamaha IT200 '86 Honda TRL200 Reflex '04 KTM 525EXC (soon to be dual sported) Several others, including project bikes, Deb's bike, and a fleet of grandkids' bikes Let's go riding! http://www.jebruns.com/Wudi19/wudi19.html http://www.ahrma.org/schedules-results/cross-country/
|
|
#979
02-07-2016, 05:43 AM
|
||||
|
||||
|
Thanks for the write up, Jim. My set up for plugging the pipe is not as elaborate as yours. I'll revisit it when I get ready to work on it.
I used a expandable rubber plug for the small end and a 2" rubber plug for the big end with the bolt removed and in it's place I used a threaded brass truck Schrader valve. I then use the nut on the threaded Schrader valve to tighten down and expand the plug. For safety, I've got plumbers strap fitted with the bolt(s) of the expansion plugs going thru the plumbers strap and folded back on the pipe and hose clamps holding the strap to the pipe. I've not put my set up to the test yet. I'll revisit it when I get enough ambition to actually do the work. For now, I'm good to go with my new pipe. Thanks again for stressing the safety issue. RB
|
|
#980
02-07-2016, 06:07 AM
|
|||
|
|||
|
How about some pics of your pipe repair setups. It may save a life!
Any using water pumps to repair pipes? https://m.youtube.com/watch?v=LTPhjaKfQRA
__________________
2003 txt250 Pro 2013 Ossa 280i
|
 |

|
|
 Similar Threads
|
||||
| Thread | Thread Starter | Forum | Replies | Last Post |
| DNF today | Pepperami | Enduro Chassis & Body | 6 | 09-18-2013 11:59 AM |
| Got my first GG today! | RonMexico | General Discussions & Announcements | 6 | 02-19-2011 12:39 PM |
| Went Riding Today and..... | coolum74 | Enduro Engine 4 stroke (including EFI & Exhaust) | 2 | 11-30-2008 01:12 PM |
| HELP! I tried to use my gasgas as a jet ski today! | sammyj18 | General Discussions & Announcements | 19 | 11-21-2008 08:01 PM |
| SHNF From Today | Boomhauer | Pictures & Videos | 13 | 10-30-2007 04:18 PM |


 Linear Mode

