
|
|
|||||||
| Enduro Suspension Tuning & maintenance of Enduro forks, shocks, etc |

 |
|
|
Thread Tools | Display Modes |
|
#11
 05-15-2014, 04:18 AM
|
||||
|
||||
|
Today I reassembled the carts, reset the locnut and clicker on the rebound end of the shaft to get the complete range of 26 clicks, and then bled them both up.
Used same procedure as here. Sorry, no video.. Measured out 225ml of fluid. I pulled mine from the container into the vacuum pump and then measured it out. I figure the less air I have in the oil to begin with the better the final product will be. It isn't neccessary, and still doesn't 100% remove the air that sits around the outer edge of the piston. 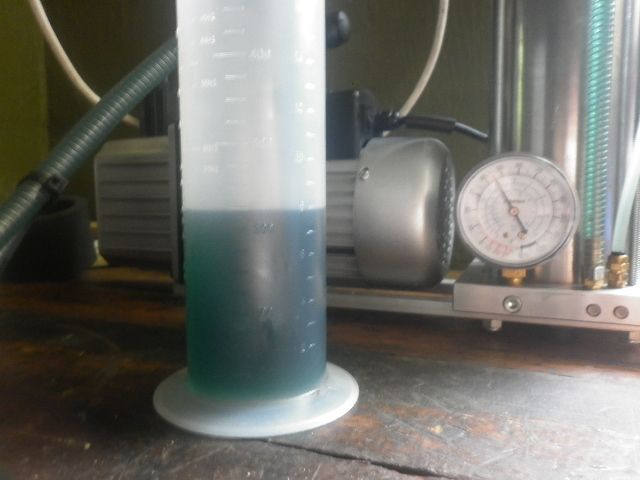 Pour her into the cartridge like you're pouring a beer. Aim here is to not splash/slosh the oil around. 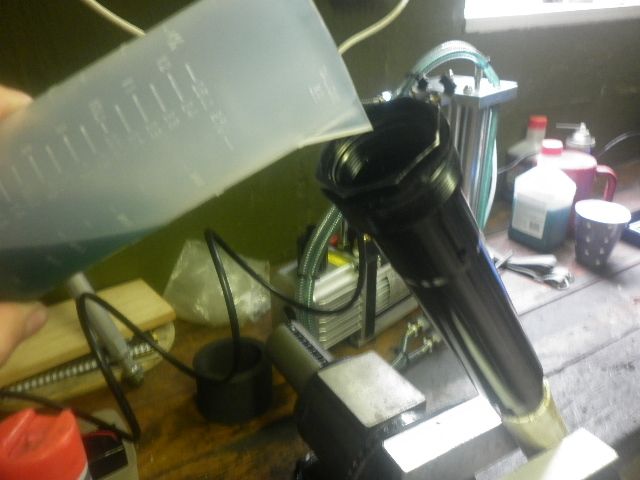 Down this end (near the rubbish bin), slowly cycle the shaft in and out until you no longer hear the bubbles/air escaping/passing through the valving. Rotate the shaft as you turn to help move air to the top and out. Don't do it too quick as to foam the oil up. Slow and smooth and you'll hear and feel it bleed up nicely. 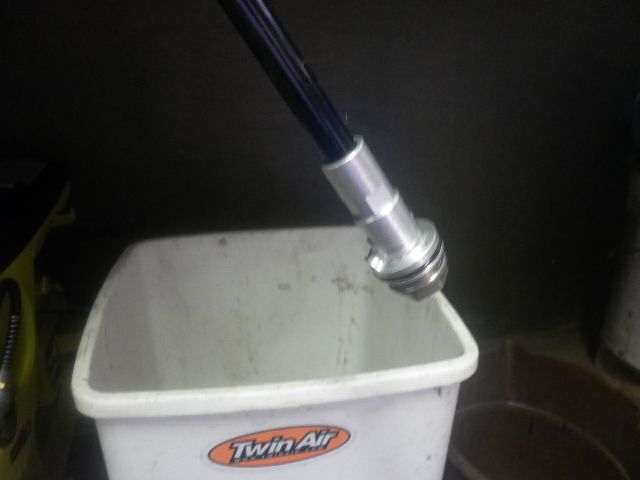

|

|
#12
05-15-2014, 04:28 AM
|
||||
|
||||
|
After that, set it aside for a few minutes to allow any other bubbles to surface while you do the same to the other leg.
Once you're back to it - follow the instructions as per previous link to insert the base valve (compression assembly). When its ready to go together it will look like this. 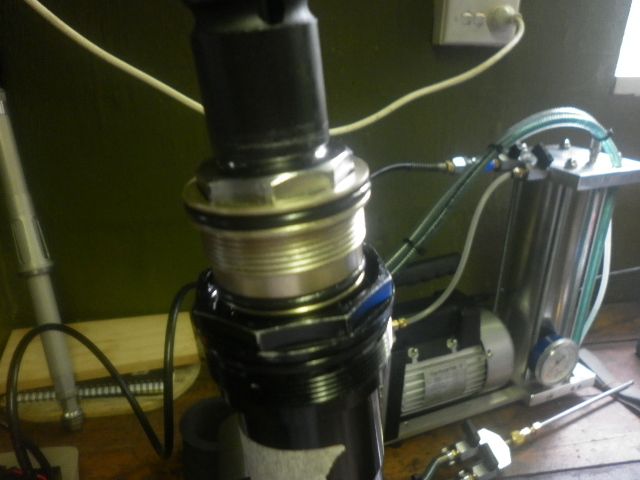 You then need push it down and engage the threads before snugging it up. I have both carts bled at the moment and no more pics, but will perhaps take a couple more tomorrow. When bleeding, make sure the cartridge is upright so it can vent the air/oil through the center of the piston. I've also found assembling with PFP at 0 (full out) is easiest for getting things back together. I then find the additional pressure created by turning the PFP fully in helps with the purging. When both are completed, set the clickers at the same position (or your specs) and then cycle them side by side. Both should feel the same when compressing, and rebound at the same speed. Parts have arrived, so next additions will be measuring spring preload, changing seals, and fitting the carts back into the legs. Easy as!
|
|
#13
05-15-2014, 08:57 AM
|
|||
|
|||
|
Very good topic Jakobi.
The PFP spring free play might not be such a big issue as you can compensate by giving more preload with the PFP adjuster. But it's important to have the same free play on both sides .I personally never went more than 2 1/2 turns in because I don't get to run on sand that much .
__________________
Vindicator '11 EC 300R
|
|
#14
05-15-2014, 04:52 PM
|
||||
|
||||
|
It might not be an issue, but it most defintely is a variation.
Put it this way, these forks with their after market springs had 12mm free play (PFP backed out). The early models had zero freeplay (PFP backed out). That difference is beyond the scope of what the PFP can change. Mine had 6-7mm. Even with the PFP completely wound in on this set of forks, they still had less preload than mine with the PFP completely out. What impact does that have on the valving that works for you, your total spring rate, where you run your clickers, etc. I'm not saying its a bad thing. I put 120kms on these forks with the PFP at 2.5 turns and they felt pretty good. I was riding fast and not getting overly beaten up. They felt a touch soft bombing downhills, especially when on the brakes. Maybe a little divey under brakes, but they were plush and didn't deflect or spike up unless if you really drove them deep into the stroke. Overall something I'd be happy to ride on. Based on that I've opted to reassemble them the same way there were with an upped rate external spring. But also having the knowledge of the play in the ICS it means that I'd also have no problem winding the PFP on through its entire range, and unlike everyone else, anything below 2.5 turns is going to feel really loungechair. It also leaves me wondering, does the same tuner use the same stacks when they don't change the ICS spring? If so, how much variation in the finished product is being seen simply due to the inner spring?
|
|
#15
05-15-2014, 04:55 PM
|
||||
|
||||
|
PS. Servicing the PFP sleeve and o-rings for assembly was by far the best thing I've done for these forks yet and can't wait to do mine! Bit of a delicate job with so many fine threads, but the difference in how smoothly and easily it works after is night and day (even on the one that wasn't cross threaded).
Thanks for your write up on that in the other thread Vindicator - saved me thinking too much.
|
|
#16
05-16-2014, 05:45 AM
|
|||
|
|||
|
12mm free play is a lot ! Was this a Marzocchi spring?
__________________
Vindicator '11 EC 300R
|
|
#18
05-17-2014, 05:34 AM
|
||||
|
||||
|
Seal installation.
Lube em up and slide them on, in the correct order of course. 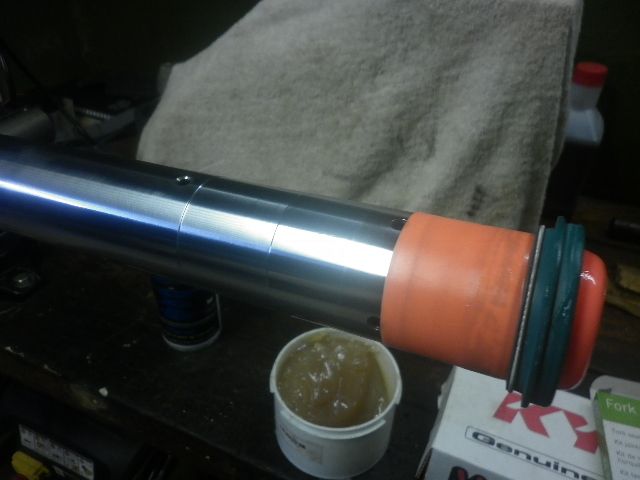 Looking good 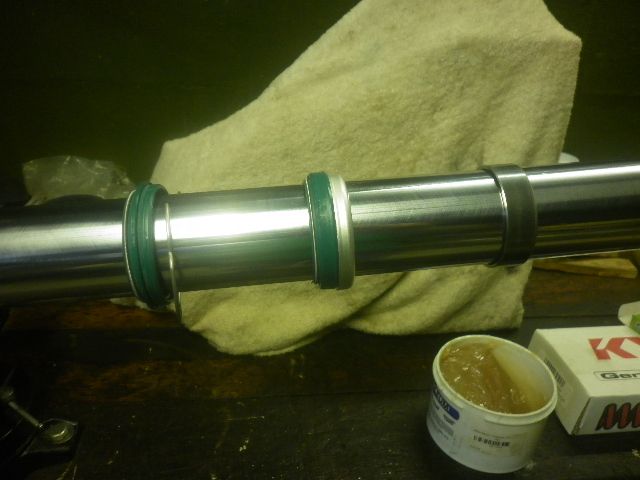 Insert the upper leg, and then use the driver to seat the bushing and spacer. 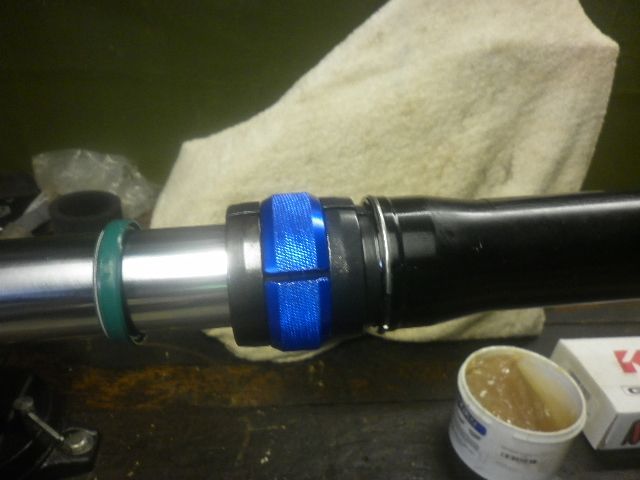 Then the oil seal  After that slide snap wire/circlip up and make sure you seat it in its groove, and then push the dust seal into place.
|
|
#19
05-18-2014, 01:44 PM
|
||||
|
||||
|
Does this servicing also work for the 46mm? They also seem similar to the WP CC that I had on my KTM's.
Sent from my iPhone using Tapatalk
__________________
15 Beta 300RR Race Sold KTM 450EXC now moving over to RED! Looks like I found the right bike. Thanks REVERUP! 2011 GasGas EC300 "Stolen By A Scum Bag" 2009 450EXC Sold to Rapid Dog EURO Factory Anti-Hop slipper clutch, GPR V4, Akropovic Full Ti Exhaust, 2013 suspension and wheels. 2009 300XC 2005 525 MXC 2000 WR 400 1996 XR 600 1987 CR500 1990 KX500
|
|
#20
05-18-2014, 04:38 PM
|
||||
|
||||
|
You mean 45mm Zokes? They're an OC fork so they share similarities in how the upper and lower join (seal, bushings, clips, etc). However removing the cart from the lower leg is a little different. Base valve is at the opposite end (bottom of fork), and the rebound adjuster needs to me removed to get the spring off. Being open chamber the bleed process isn't as involved with no purging required.
I had a good link to a how to, but the website seems to be down at the moment.
|
|

|
|
 Similar Threads
|
||||
| Thread | Thread Starter | Forum | Replies | Last Post |
| Marzocchi 48mm CC Forks | SolidPerformance | Enduro Suspension | 334 | 01-08-2019 07:32 AM |
| Marzocchi 48mm Challenge! | Jakobi | Enduro Suspension | 21 | 08-02-2014 04:10 PM |
| 48mm Marzocchi Manual | Clay | Enduro Suspension | 5 | 04-11-2013 01:51 AM |
| Marzocchi 48mm 2nd service | GMP | Enduro Suspension | 1 | 02-04-2013 04:16 PM |
| 48mm Marzocchi warning! | STM Suspension | Enduro Suspension | 17 | 03-22-2012 03:44 PM |


 Linear Mode

