
|
|
|||||||
| Enduro Suspension Tuning & maintenance of Enduro forks, shocks, etc |

 |
|
|
Thread Tools | Display Modes |
|
|
|
#1
 05-13-2014, 04:18 AM
|
||||
|
||||
|
Doing a bit of work on a friends forks and thought I'd take a few pictures along the way for anyone who's interested. Perhaps a little info on whats what, and I'll try and snap some more on the bleed procedure once the new parts arrive.
These forks had previously been worked on by someone else and I haven't been overly impressed with the lack of attention to detail. Never the less, these things happen. Upon receiving the forks I gave them a through inspection. Dropped the dust seals and cleaned them a bit. Neither leg appeared to be leaking after this. Compression and Rebound settings recorded, and PFP as well. When going through these noticed all clickers had been assembled without the correct range of 26 clicks. They all varied from 20-24. The PFP on one leg was considerably firmer to turn, and when backing it out proceeded to come out a full 6 turns where the other only came out 2. I set the clickers back and PFP at 2.5 and rode the forks for a 120km loop to get a feel for how they were working. They felt very plush but also had that similar feeling that stock forks have. I can't describe it well but it feels like a lot of bleed. The forks rode quite well but I think they would definitely be better with an increase in spring (which we plan to do). 
|
|
#2
05-13-2014, 04:23 AM
|
||||
|
||||
|
After the ride it was time to begin the servicing and pull down. Removed the forks and opened the outer leg and drained the oil.
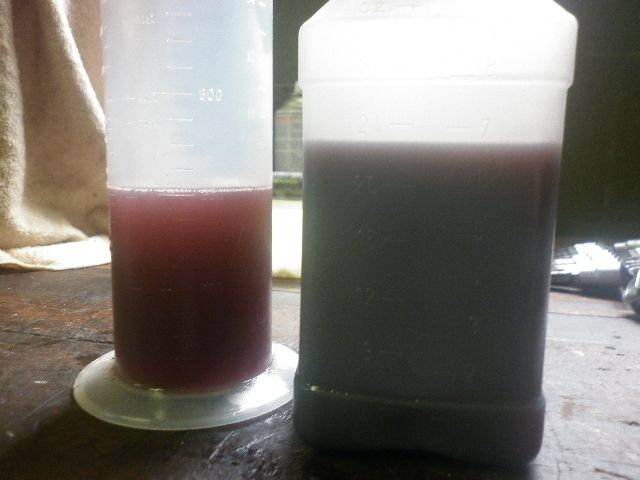
Very low fluid volumes in the outers (well below the 300ml minimum spec). Only leg had around 225ml where the other had around 235ml. Oil was a bit contaminated. After draining the oil, placed the forks in the vice to undo the 19mm nut that holds the cartridge in the leg. 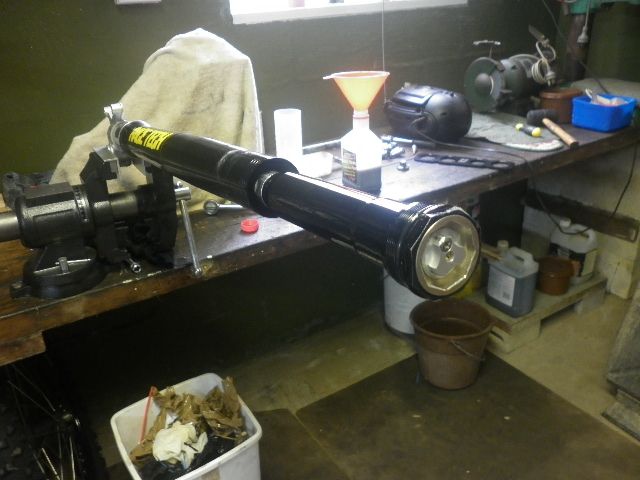 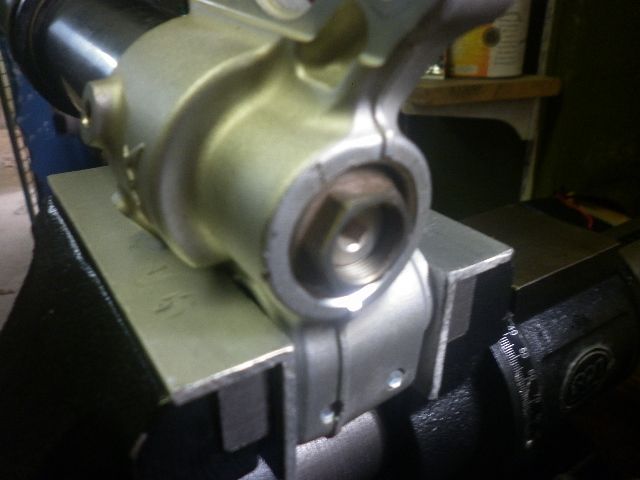 One the nut is removed the cart will pull straight out the other end, and the spring will also come out at the same time. 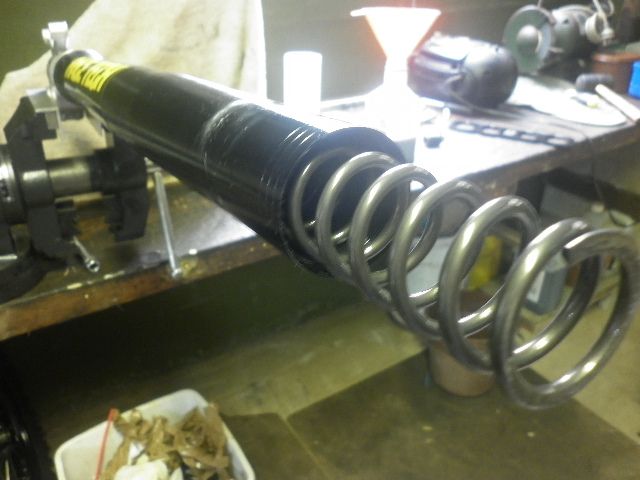
|
|
#3
05-13-2014, 04:32 AM
|
||||
|
||||
|
Pry the dust seal down and then remove the circlip that holds the oil seal in. I used the heat gun to warm up the outer leg to assist with removal, and then in a slide hammer action pull the upper and lower legs apart.
 Place all parts in order in a clean work area. 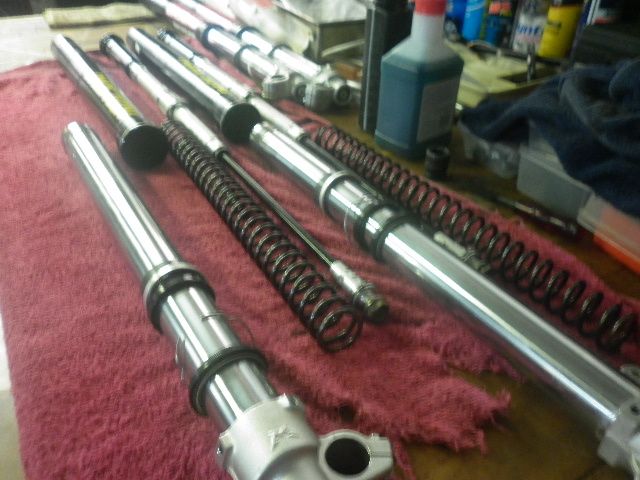 Next, mount the cartridge in the vice and remove the compression assembly using your tool. I took the time to crack them and make sure they'd undo while the fork was still on the bench as a whole. 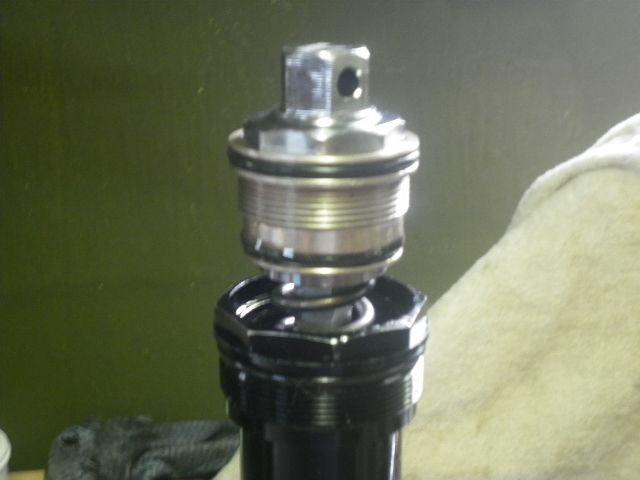 As the comp assembly unthreads it will pop up a bit. I find stroking the shaft in will push the whole assembly up some more. You can then hold the comp adj and pull the shaft down and you will hear it pull some air into the forks. Each time you cycle it back up it will push the assembly out a bit more until it comes out. Be careful if pulling on it as it will 'pop' out.
|
|
#4
05-13-2014, 04:38 AM
|
||||
|
||||
|
Drain the oil from the cart and cycle the shaft to bleed the oil out.
 At this stage while inspecting the comp assemblies I noticed the springs had been replaced from the stock 2.0kg/mm to 1.8kg/mm. The springs appear to be shorter allowing more area for the piston to float above its stops. I also picked up that one of the PFP adjusters had been cross threaded. Nice. 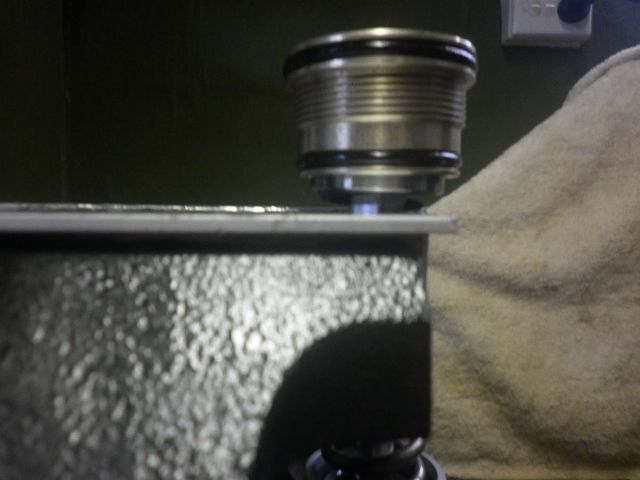 I managed to disassemble these and with some care was fortunate enough that they went back together as they should have. Corrected the length on the threads to get a full range of 26 clicks on both adjusters. Cleaned and lubricated both assemblies and now the PFP turns with nothing more than a socket in the palm of my hand. Much improved. Very noticable that there is quite a bit of free play in these springs though. Now waiting on the replacement springs and seals. More to follow. Last edited by Jakobi; 10-31-2016 at 07:40 PM.
|
|
#5
05-13-2014, 05:54 AM
|
||||
|
||||
|
Great write up and detail mate.
Interesting finds in there??? Mark
__________________
Xr 250 ( first bike) 98 Rmx 2007 Gas gas 300(swapped for trials bike) 2008 280 Raga replica 2012 Gas gas ec 300 E 
|
|
#6
05-13-2014, 10:21 AM
|
||||
|
||||
|
Awesome report Jake, waiting to hear of finished product....
__________________
Fred Overstreet 2010 EC250 SixDays 2004 GasGas EC300 -Sold to a good home 2006 GasGas EC250-Sold to a good home 2006 GasGas TXT 280 Pro 
|
|
#7
05-13-2014, 09:28 PM
|
|||
|
|||
|
Quote:
My pfp spring is the same it has 5-7mm free play with pfp at fully out. I reckon that's the cause of the rattle I hear when the suspension is busy. When my tuner was working on them the other day he mentioned his opinion of the adjustable preload is that it's a bit of a gimmick. Ie when fully wound on with say 10mm of preload you have effectively applied 20kg of force to the spring. However when the fork action does overcome that initial force the pfp spring will then compress at its usual rate of 2kg/mm or whatever it is. So really all winding the pfp in does is make the initial action of the fork firmer/harsher. He revalved my forks with the pfp wound out and didn't seem fussed by the free play. If anything it should make the initial action plusher. However when it does start compressing the pfp spring could also cause a harsh spike? Time will tell I have a big ride this weekend on the newly revalved forks.
__________________
Current: 2014 Gas Gas EC300R _____________________________________________ Previous: 2011 Gas Gas EC300 ELC 2004 KTM 300 EXC
|
|
#8
05-13-2014, 11:02 PM
|
||||
|
||||
|
When the fork is assembled and bled correctly, the piston will always settle into the same position in the cartridge. You can overfill the fork as much as you want, but the purging process will always see the piston at the same point (on the cusp of the bleed taper of the shaft), when the shaft is bottomed out.
Working backwards from here, the shaft must displace a given volume of oil as it enters the cartridge, which in turn passes through the base valve and continues to displace the floating piston. This point is 7mm from the ICS bottoming stop. So if the spring has 0 preload with the PFP backed out, it will have around 7mm preload once bled. If the spring has 7mm free play, it will have 0 preload when installed. However, in the case above at around 10mm free play the spring will still have 3mm free play (negative preload). This leaves the springs foating around, and means that the ICS won't effectively 'push' the cartridge rod back to full extenstion. Pulling the rod out will still sink the piston into its position. The biggest consideration with all this is that it has a massive effect on where you're PFP adjuster ends up in comparison to someone else, so much so that it could mean that me running my PFP fully in is comparable to someone else running theirs fully out. I don't think anyone would debate that a half a turn on the PFP is noticable, so thats some very large differences which also makes it hard to compare valving stacks and overall spring rates from one bike to the next.
|
|
#9
05-15-2014, 04:18 AM
|
||||
|
||||
|
Today I reassembled the carts, reset the locnut and clicker on the rebound end of the shaft to get the complete range of 26 clicks, and then bled them both up.
Used same procedure as here. Sorry, no video.. Measured out 225ml of fluid. I pulled mine from the container into the vacuum pump and then measured it out. I figure the less air I have in the oil to begin with the better the final product will be. It isn't neccessary, and still doesn't 100% remove the air that sits around the outer edge of the piston. 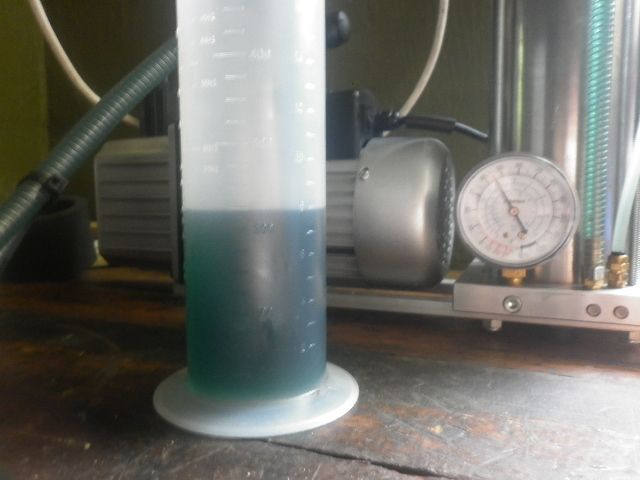 Pour her into the cartridge like you're pouring a beer. Aim here is to not splash/slosh the oil around. 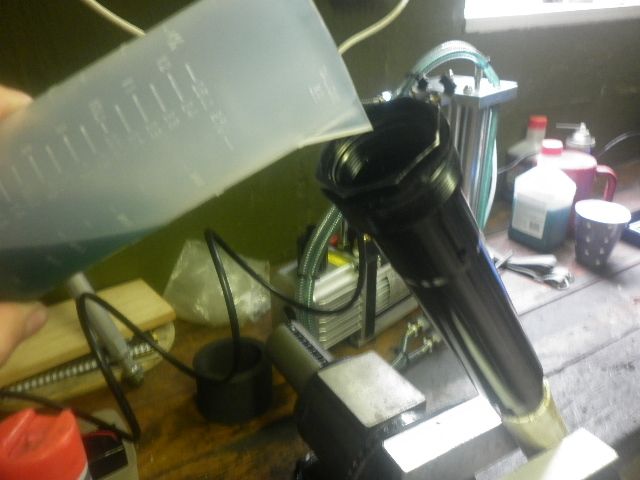 Down this end (near the rubbish bin), slowly cycle the shaft in and out until you no longer hear the bubbles/air escaping/passing through the valving. Rotate the shaft as you turn to help move air to the top and out. Don't do it too quick as to foam the oil up. Slow and smooth and you'll hear and feel it bleed up nicely. 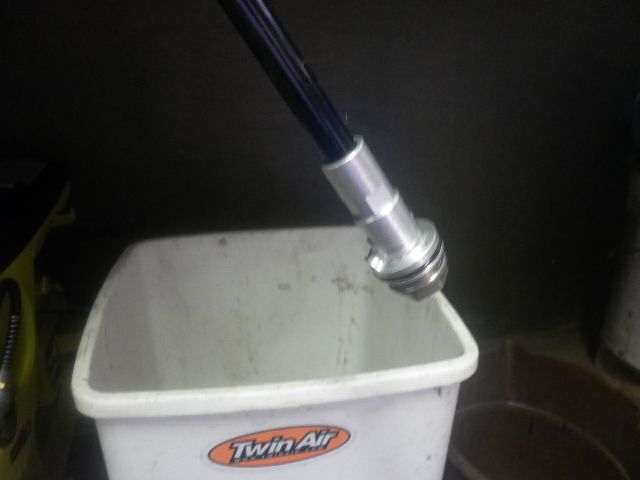
|
|
#10
05-15-2014, 04:28 AM
|
||||
|
||||
|
After that, set it aside for a few minutes to allow any other bubbles to surface while you do the same to the other leg.
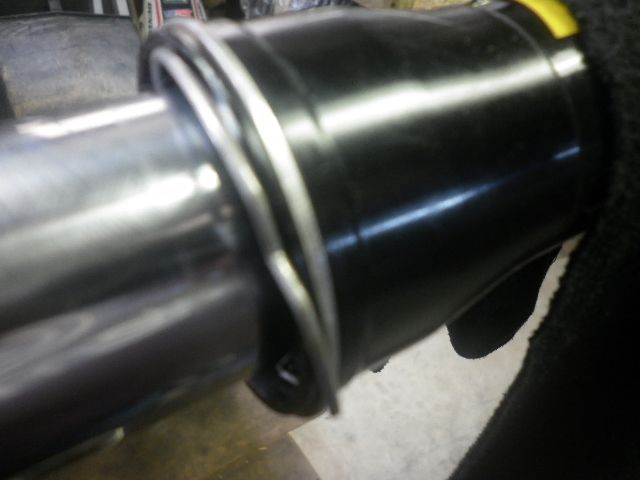
Once you're back to it - follow the instructions as per previous link to insert the base valve (compression assembly). When its ready to go together it will look like this. 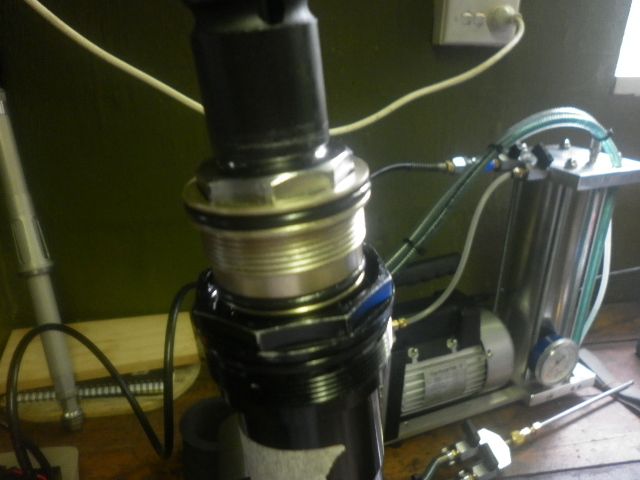 You then need push it down and engage the threads before snugging it up. I have both carts bled at the moment and no more pics, but will perhaps take a couple more tomorrow. When bleeding, make sure the cartridge is upright so it can vent the air/oil through the center of the piston. I've also found assembling with PFP at 0 (full out) is easiest for getting things back together. I then find the additional pressure created by turning the PFP fully in helps with the purging. When both are completed, set the clickers at the same position (or your specs) and then cycle them side by side. Both should feel the same when compressing, and rebound at the same speed. Parts have arrived, so next additions will be measuring spring preload, changing seals, and fitting the carts back into the legs. Easy as!
|
|

|
|
 Similar Threads
|
||||
| Thread | Thread Starter | Forum | Replies | Last Post |
| Marzocchi 48mm CC Forks | SolidPerformance | Enduro Suspension | 334 | 01-08-2019 07:32 AM |
| Marzocchi 48mm Challenge! | Jakobi | Enduro Suspension | 21 | 08-02-2014 04:10 PM |
| 48mm Marzocchi Manual | Clay | Enduro Suspension | 5 | 04-11-2013 01:51 AM |
| Marzocchi 48mm 2nd service | GMP | Enduro Suspension | 1 | 02-04-2013 04:16 PM |
| 48mm Marzocchi warning! | STM Suspension | Enduro Suspension | 17 | 03-22-2012 03:44 PM |


 Hybrid Mode
