
|
|
#91
 04-24-2013, 12:59 AM
|
||||
|
||||
|
Then I spread out all the parts and specced up the steels and fibers.
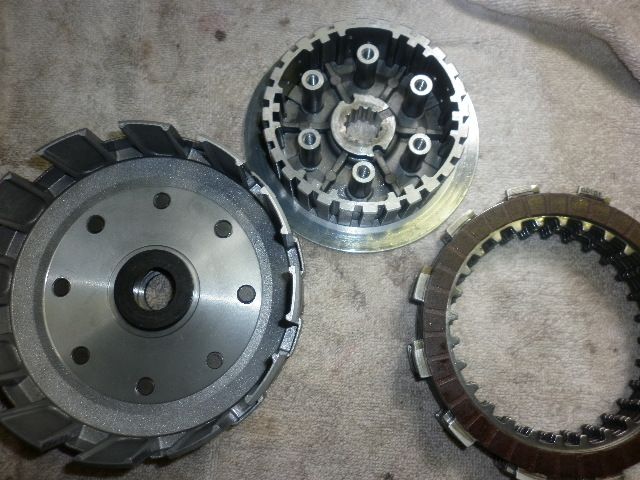 For the fibers Gas Gas advises standard size is between 2.75 to 2.85mm, with a limit of 2.68mm. My fibers all came in at 2.73mm. Showing some wear but should be good for a while yet. I'll definitely keep an eye on them and probably check them again in 50hrs or so. 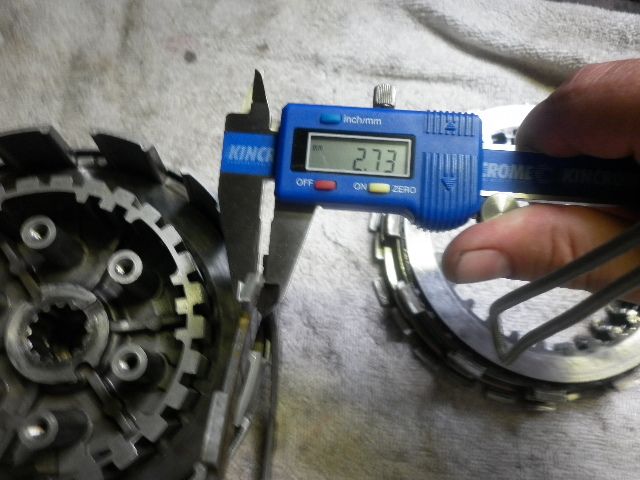 No issues with the steels at all. I still need to check they haven't warped which I will do before installing them. Size wise they measured 1.49mm. Spec being 1.45 - 1.55mm with a limit of 1.40mm. 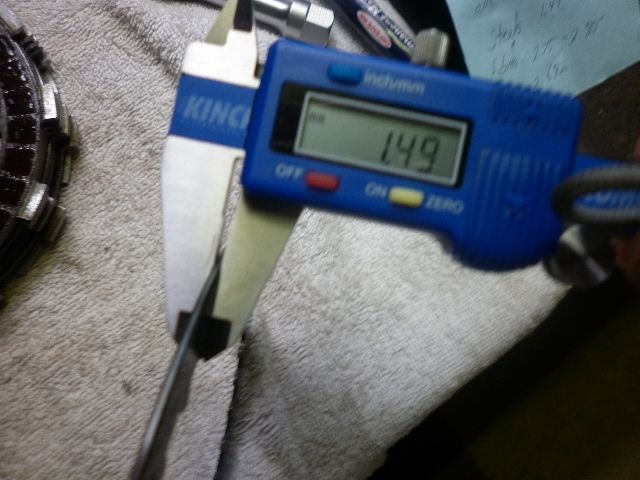

|

|
#93
04-24-2013, 02:07 AM
|
|||
|
|||
|
I have heard talk of balanced (or counter balanced) cranks on this forum, is it something that can be done when you are doing a bottom end rebuild? Or is it something that needs to be designed into the bike at the factory?
<just planting a seed here>
__________________
2003 txt250 Pro 2013 Ossa 280i
|
|
#94
04-24-2013, 02:38 AM
|
||||
|
||||
|
I looked into it a little bit Matt. Essentially you'll never get a single cylinder engine balanced. What you can do is either set it up to be slightly underbalanced, or slightly overbalanced. What this does is changes the plane in which the vibrations occur. Either up and down, or forward and back. The later being less noticable/annoying to the rider.
Out of the factory the cranks (like the rest of the engine) have set tolerances that are deemed to be acceptable, but are not optimal. The cranks can have a certain amount of run out, and simply by having someone precision true the crank the vibrations are reduced noticably. This is what I had done. Then GG also uses a counter weight which attaches directly to the crankshaft on the primary drive side. Not sure how this effects things, but I'd say its very similar to a flywheel weight that just adds some inertia and smooths things out, while also counter weighting the rod and piston.
|
|
#95
04-27-2013, 09:53 PM
|
||||
|
||||
|
I thought you would have got some cracking discussion with the above question Matt. I was looking forward to learning more too!
Back onto the build. Nothing else has happened. The gasket never made it to me Friday and then weekend the post office is closed and I'm back at work. I spent a few minutes pulling the P3 pipe guard and gave the pipe a quick cleanup. Nothing too impressive but enough to look half alright again.
|
|
#96
05-01-2013, 12:18 AM
|
||||
|
||||
|
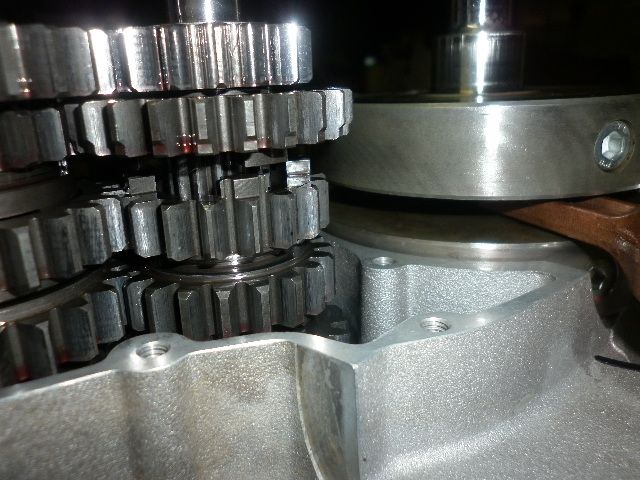
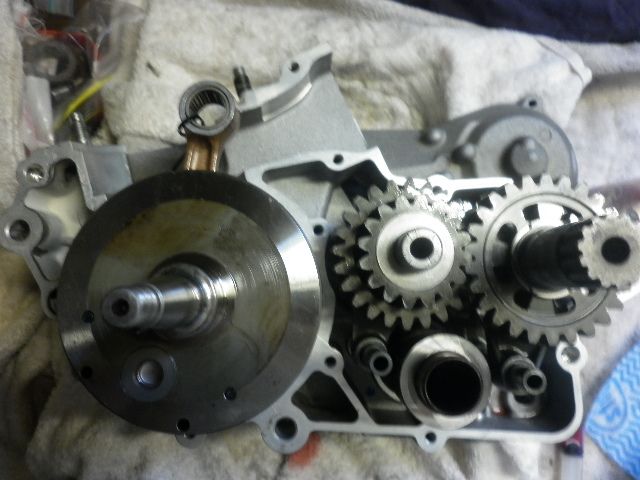
The build goes on. Today I decided to do a bit more. Cheers to scottys for helping me out with a replacement gasket. It all fit up nicely. The cases went together well with a cold crank. To be honest there was more reistance on the counter sprocket shaft than anywhere else. Bit of a snug fit and explains why the gears wanted to lift out with it when I originally split the cases.
All buttoned up again 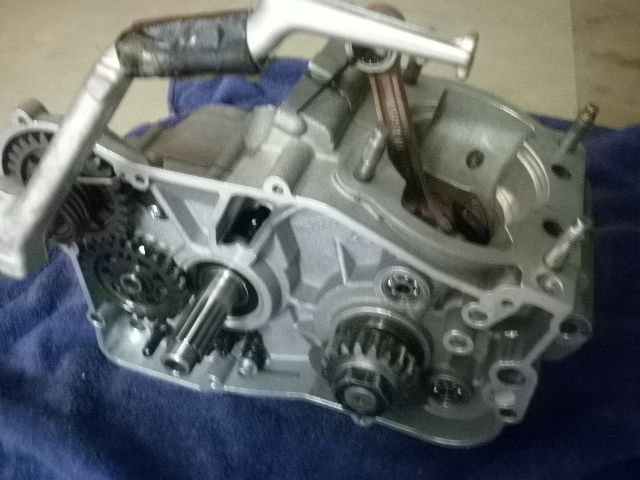 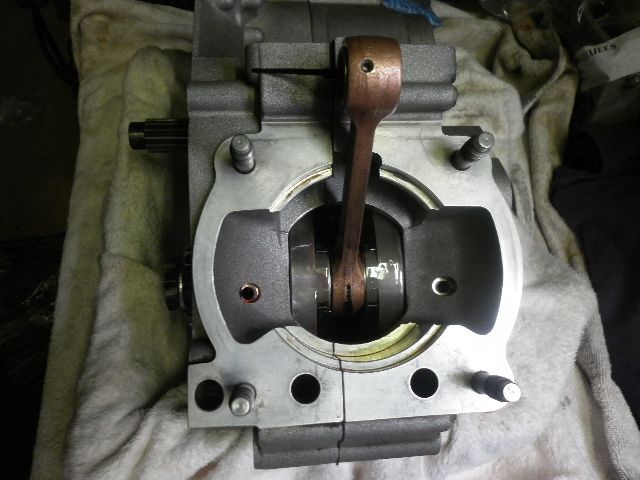 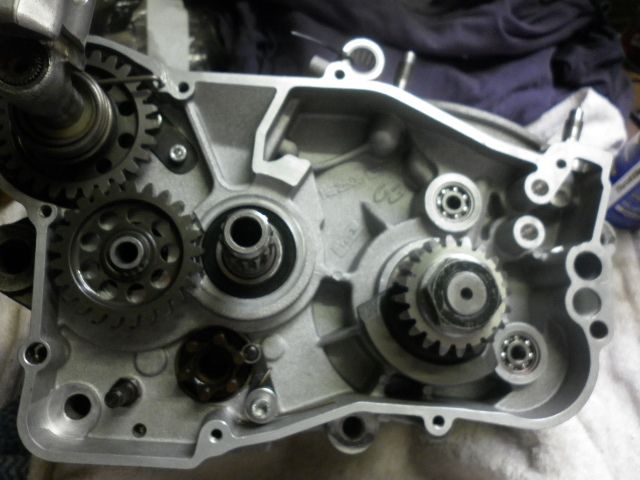 And for reference, this is where I set the spring at rest. Took some effort to bring it right around but the kicker recoils all the way as expected. 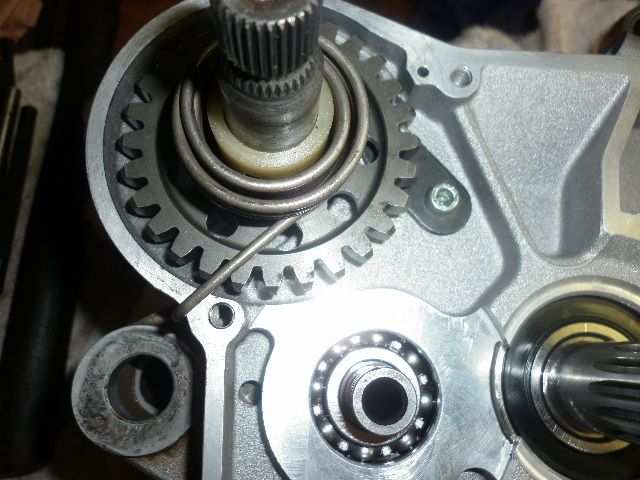
|
|
#97
05-01-2013, 12:30 AM
|
||||
|
||||
|
Now for the questions.
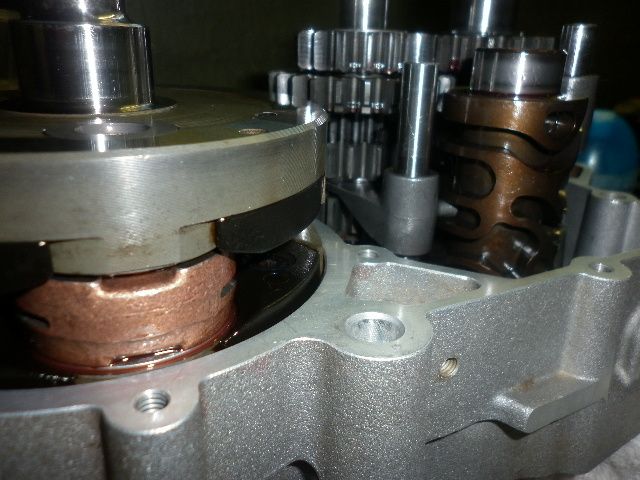
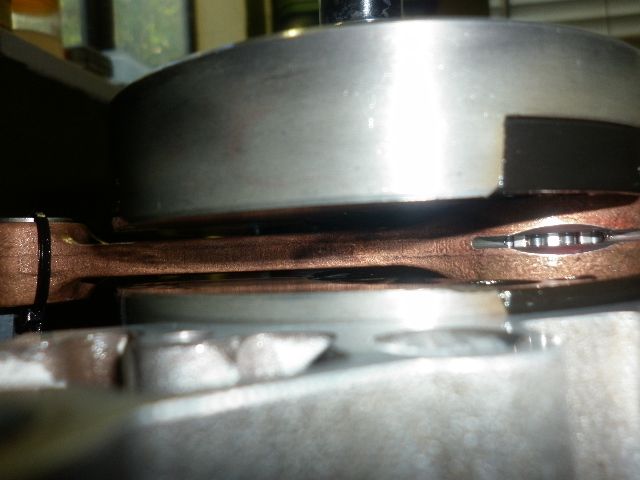
With the pri side crank seal. I originally seated the seal flush with the case but the bush only just ran the seal lip right near the edge. I checked my photos from pull down and they all showed the seal being pressed in further so I did that. It now allows the seal to run a good couple mm's in on the bushing. With the pri side gear and nut. The key pressed into the crank with a light taps of a punch. It didn't take much but I couldn't push it in by hand. I had froze the key before doing this too. The counter weight and gear all went on without issue. Same for the nut. However, I have no idea who to measure if I have 40nm on it or not. I used a battery operated impact to rattle it up till I thought it was pretty tight. Marked the nut and crank with a permanent marker and rattled some more until it moved a few mm tighter. Thats about as tight as it'll go with this gear. I also used blue loctite. Is it ok to use the stop in the plug hole to torque up the pri side nut with the torque wrench once the engine it back together or will that be too much load on the big and little end? The little gear locking unit was heaps of fun to install. Got there in the end. New starter rachet and pinion installed as the kicker would sometimes slip upon engagement in various positions.
|
|
#98
05-01-2013, 06:58 AM
|
|||
|
|||
|
Quote:
Last edited by Packman; 05-01-2013 at 06:59 AM. Reason: spelling again lol
|
|
#99
05-01-2013, 08:08 AM
|
||||
|
||||
|
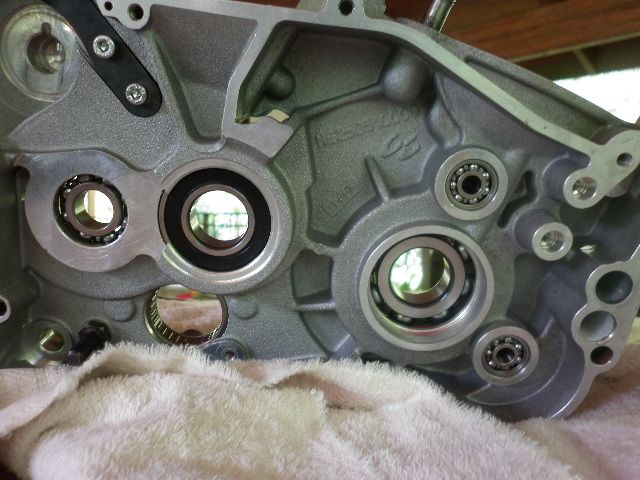
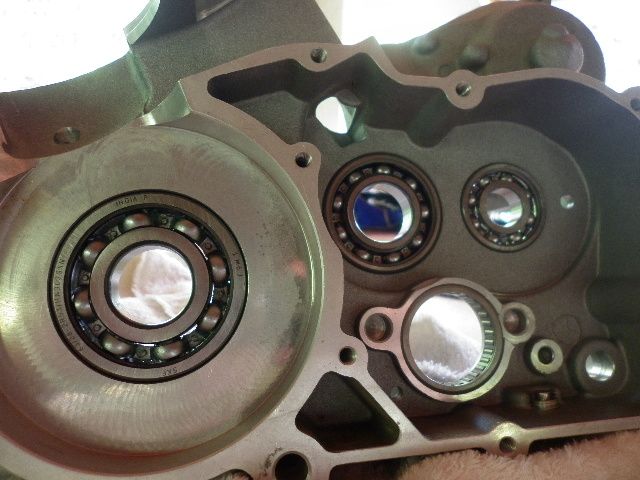
Older GGs always had top notch Euro or Japaneese bearings OEM. I never pulled a Chineese or Indian bearing out of a GG motor. Now, with the financial climate as it is and the govt. banks controlling things, cheap stuff would not surprise me. I get all my stuff from a supplier that understands this and will not sell you crap.
Jake, I don't like to lock the top end to torque the primary, prefer to lock the gears with a piece of aluminum or copper.
|
|
#100
05-01-2013, 09:24 AM
|
||||
|
||||
|
Not all the bearings were indian skfs. But that one main definitely was. I think the one that came out was too. All part of a global economy. I'd prefer quality jap bearings and now that I know whats in there and its not so daunting, if I ever get to where I need another bottom end rebuild I'll be sourcing Nachi bearings from the local supplier. For me this whole bottom end experience has been a first, and while I understand mechanics well in theory, I have my fair share of struggles in practice. Things never work as easily as they should.
 I've learnt quite a bit by doing this with the help of everyone here. I've learnt quite a bit by doing this with the help of everyone here. I'll see if I can use an aluminum washer between the clutch gear and pri drive and get the torque wrench onto them tomorrow. It didn't look like there was much room behind the basket but I'll double check! Thanks
|
 |

|
|
 Similar Threads
|
||||
| Thread | Thread Starter | Forum | Replies | Last Post |
| First Top-End Rebuild on a 2007 EC250 | speedy08 | Enduro Engine - 2 stroke | 9 | 06-22-2011 09:16 PM |
| EC250 engine rebuild? | robszombie | Enduro Engine - 2 stroke | 3 | 12-07-2009 11:38 AM |


 Linear Mode

