
|
|
|||||||
| Enduro Engine - 2 stroke Cylinder, Piston, Tranny, Bearings, Clutch, Pipes & Silencers, etc. |

 |
|
|
Thread Tools | Display Modes |
|
#11
 04-16-2013, 05:35 PM
|
||||
|
||||
|
Quote:

|

|
#12
04-16-2013, 06:49 PM
|
||||
|
||||
|
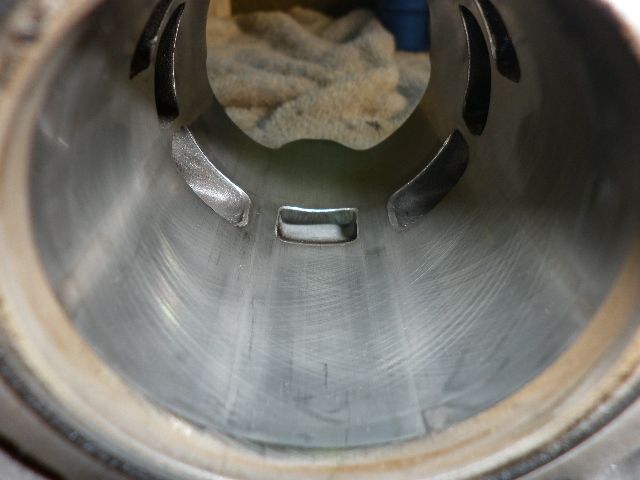
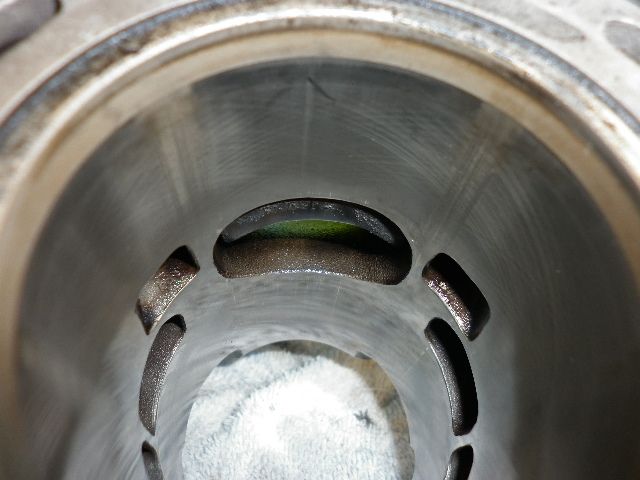
When installed the rings were as follows
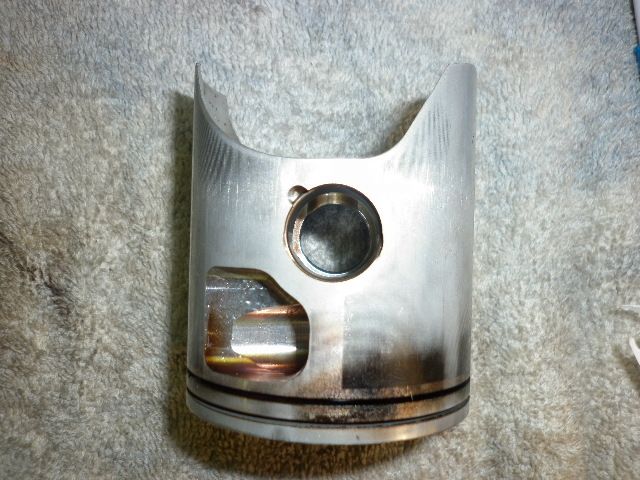
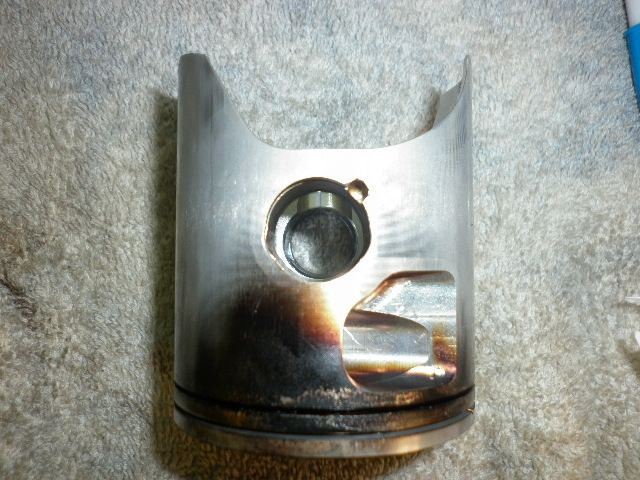
Top ring: 0.27mm Bottom: 0.33mm After 100hrs they have both worn but the top ring seems to have showed considerably more wear than the bottom. The gaps where measured at Top ring: 0.88mm Bottom: 0.63mm The crank feels like it has no up anddown play but it does feel a bit like it can rock side to side. Actually side clearance when pushed up against the thrust bearing/washer is 0.8mm. Here are the piston pictures. She sure has ran on the ragged edge from inspection of the underside. Will probably trade out the 175 main for a 178 or even a 180 as the colder months come upon us. The piston dome has been wiped down with a clean rag now and the little carbon on top wiped off easily. There are some harder carbon deposits sitting in the transfers and I would say these would have occured during a testing phase. Basically I have been running 40 N3CW#3 175 for the majority of the top end, but had run as lean as 42 N3EJ#1 178 for a small time. Obviously everywhere in between too. Interestingly, the piston underside has more carbon buildup on the intake side of the dome where you'd typically expect the exhaust to be the hotter part. The skirts look good and you can still see the remains of the coating on the piston in many places. Wiped down 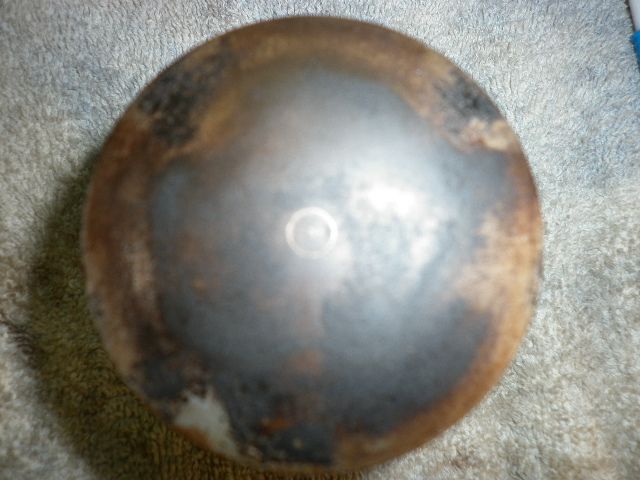 Underside (exhaust side at top) 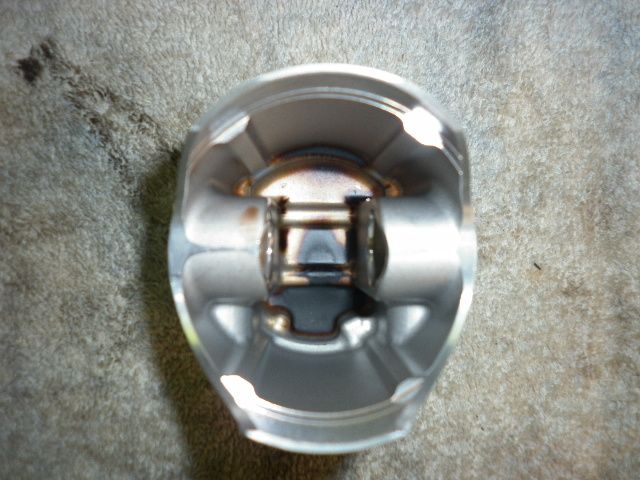 Intake Side 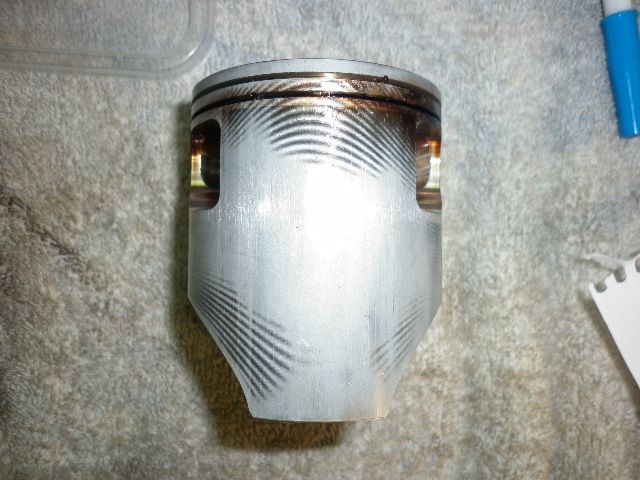 Exhaust Side 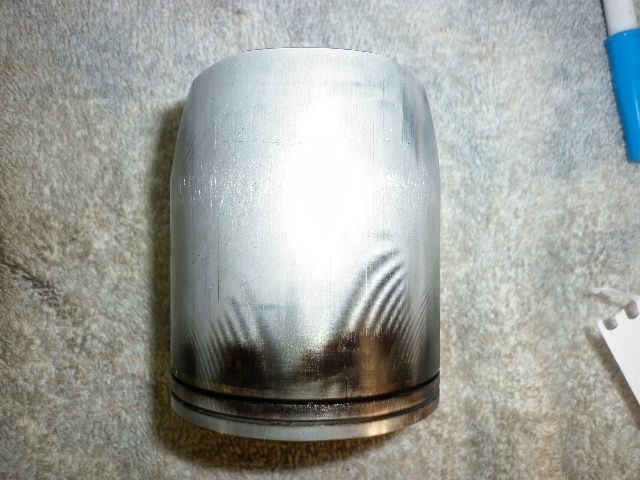
|
|
#14
04-16-2013, 06:55 PM
|
||||
|
||||
|
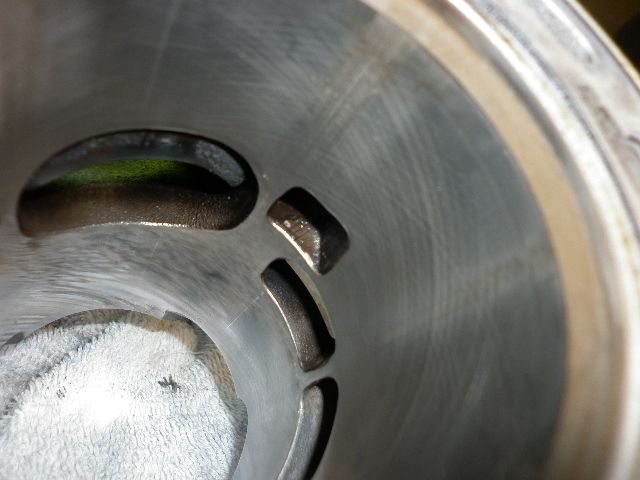
Here's the cylinder. Its still got loads of cross hatching visble. It hasn't been cleaned or deglazed yet. Appears to be markings in areas but nothing that I can feel and should clean up well. I think the rings were stretched out a bit too far at 110hrs.
|
|
#16
04-16-2013, 10:47 PM
|
||||
|
||||
|
Ok after couple of loads of washing I decide its time to delve into the unknown. Of course this is when the fun and games (read sweat and frustration) begins.
Of course I had to miss one of the bolts holding the cases together even after being sure I had them all! It just had to be done. No wonder the cases wouldn't part and it felt much harder than I imagined it would. Luckily I didn't perserver too much. I admit I was stupid enough to work on it longer than I should have though. I'm just gratefull I didn't crack the cases or anything stupid. Next up cases split. Gee that was really easy with all the bolts out. Apart it comes nice and evenly. As I'm lifting the top off and watching what I'm doing carefully I notice the gears want to stay with the top half, so I let them do just that. Everything is still nicely meshed together and sitting in the other half of the cases. Fair enough. The main bearing on the flywheel side of the engine decided it wasn't playing the game and is still on the crank, with no bearing in the case. Is it ok just to use some heat and hold the bearing in the vice while pushing the crank back out? And.. The other side of the crank needed to have the keyway removed before it would press back out. The manual makes no reference at all to this. Is it just a press fit back in at the end? I'm worried it'll fall back out. So after all that, I am where I want to be. A little wiser to the whole process, and ready to go and drop the crank in at the shop tomorrow morning. 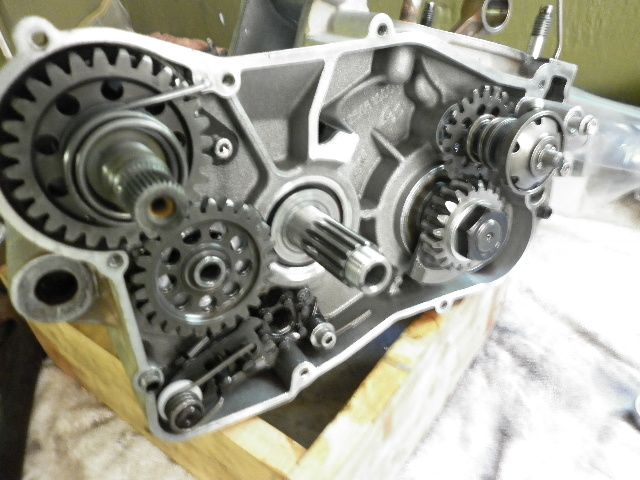 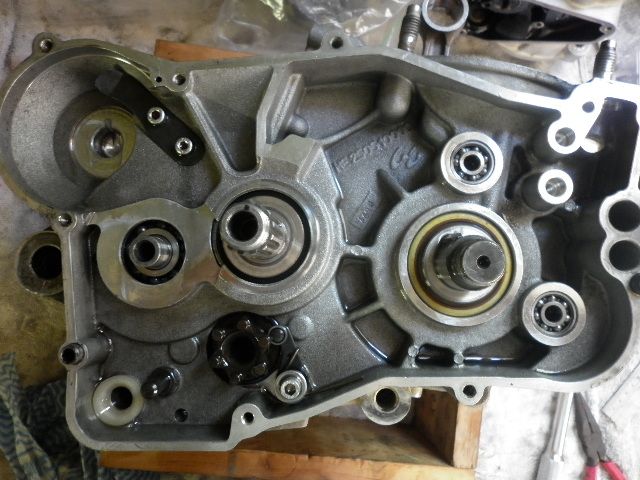 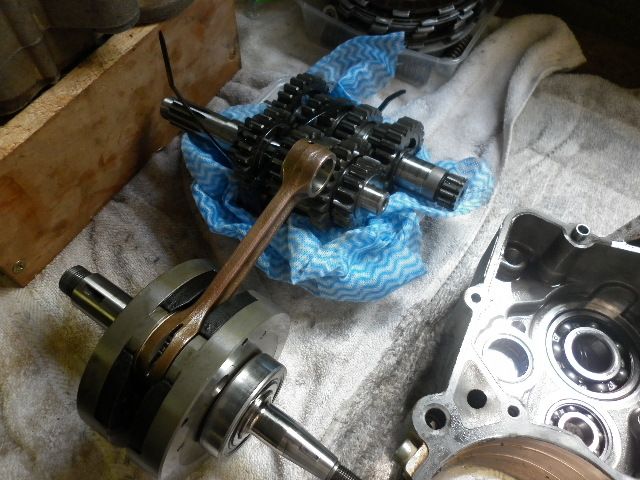
Last edited by Jakobi; 04-16-2013 at 11:43 PM. Reason: Pics added
|
|
#17
04-16-2013, 11:47 PM
|
||||
|
||||
|
And cases once split
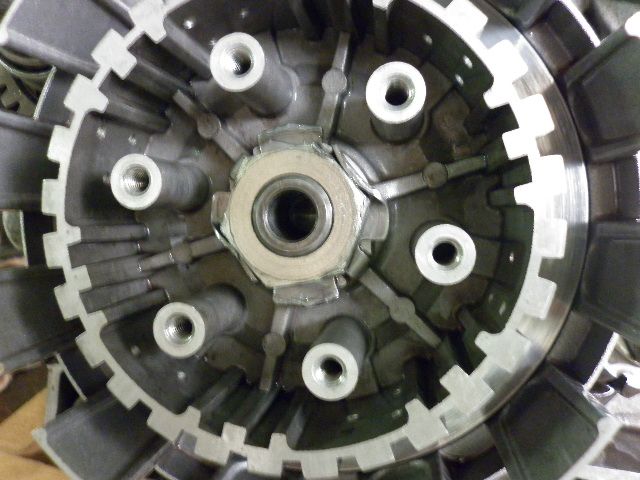
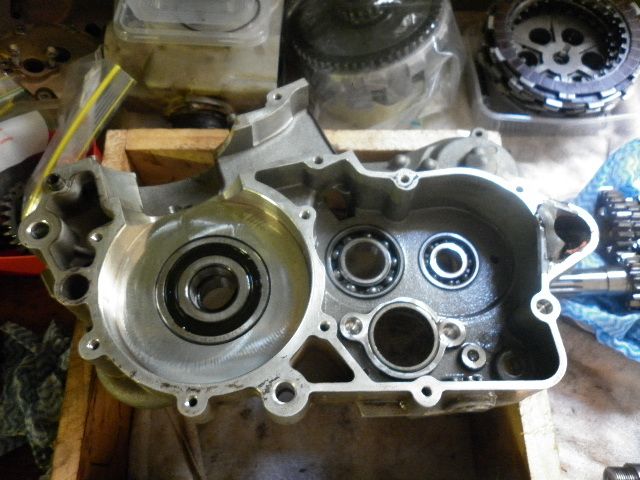  Heres some close ups of the rust on the governor spring. 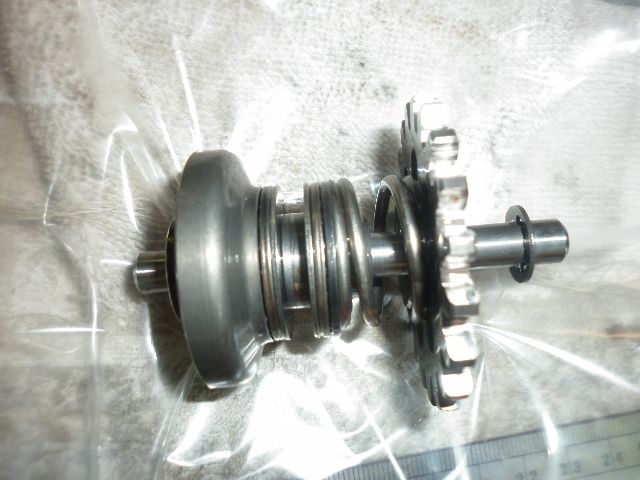 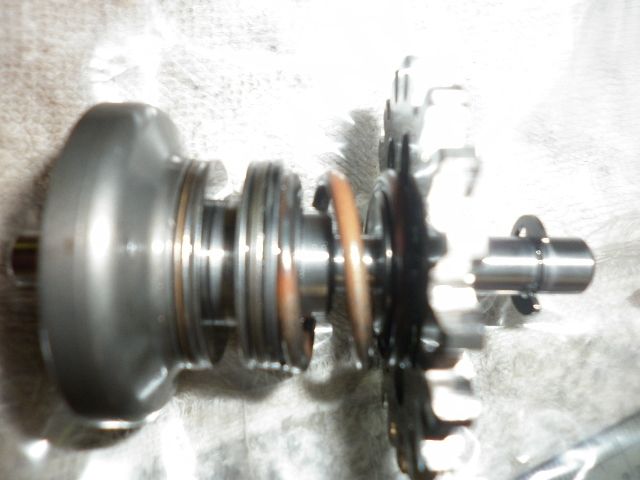 In regards to the gearset, is there anything I should be looking for in terms of wear or damage? I'm not sure what they should look like originally so hard to know whats normal or not.
|
|
#18
04-17-2013, 12:33 AM
|
||||
|
||||
|
Quote:

__________________
Steven Beane #275 PlusOnePerformance - Superior Service the World Over - Dearborn MI AMA District 14 (Michigan) Officer  afterhourscycle.com Michigan's Beta and TM Race Headquarters Last edited by twowheels; 04-20-2013 at 07:36 PM.
|
|
#19
04-17-2013, 12:44 AM
|
|||
|
|||
|
You're certainly not the first person to try splitting cases without removing all the bolts! You'll never do it again, that's for sure!
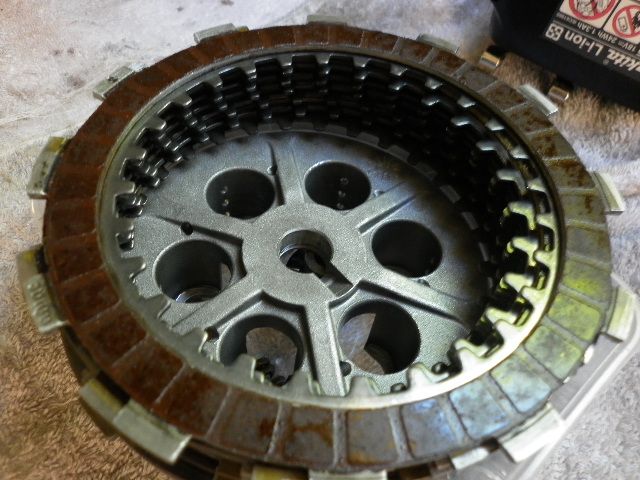
That piston has run really hot, thought it'd look like that based on the build up on the crown. I wouldn't go any more advanced with ignition just yet. Definitely go up one on the main. The comp is on the high side and most likely causing a bit too much heat. I know you love the way it runs but if you want to go down half a point on UCCR then just send the head back and ill take some volume out... Then you'll be able to jet down and may unlock some extra power, at least up top anyway. With the transmission just look for scoring, discolouration, wear marks, etc on the teeth, shift forks and dogs. Some minor wear is normal, a lot of wear or discolouration is not.
|
|
#20
04-17-2013, 04:55 AM
|
||||
|
||||
|
Quote:
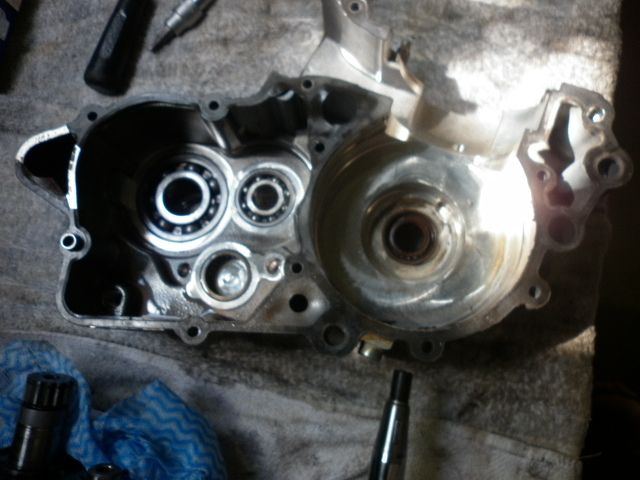
I had a quick go at removing the main bearing from the crank using some heat but didn't have much success. I'll do it in the dealers workshop tomorrow morning when dropping it off. He'll then have Griffo rebuild the crank. You are totally right about the splitting cases too. I'm still banging my head that I spent the time I did dicking around with it. As soon as I felt resistance at the puller I should have realised what was up. It won't happen again! Part of the learning experience too. I also had some fun cracking both the 30mm nuts for the crank pinion and the clutch basket. Used the electric impact on both of them but they took quite a bit of work to rattle free, even when holding the basket and blocking the pinion. In regards to the plastic spacer, already taken care of and back on the shift shaft where it belongs. Lots of tupperware and takeaway containers filled with parts in snappy bags. Next stage, cleaning up the cases and getting the old bearings out and the new ones in. Maybe not tomorrow, but will at least get a start on it before heading back to work for another tour.
|
|

| Thread Tools | |
| Display Modes | |
|
|
 Similar Threads
|
||||
| Thread | Thread Starter | Forum | Replies | Last Post |
| First Top-End Rebuild on a 2007 EC250 | speedy08 | Enduro Engine - 2 stroke | 9 | 06-22-2011 09:16 PM |
| EC250 engine rebuild? | robszombie | Enduro Engine - 2 stroke | 3 | 12-07-2009 11:38 AM |


 Linear Mode

