
|
|
#31
 04-30-2016, 09:26 PM
|
|||
|
|||
|
If you're doing crank bearings and seals, it may not hurt to replace the kickstart, shifter, and waterpump seal... and the primary seal/o-rings
I didn't think about this and decided to order them while I'm doing the crank seals. Last edited by RockefellerGG; 05-07-2016 at 01:55 PM. 
|

|
#32
05-07-2016, 01:22 PM
|
|||
|
|||
|
Time to disassemble the transmission. When you split the cases, the gears may be in the opposite case side... mine came out this way, so here it goes:
 Slide out the shift rails:   I marked the position of the shift drum, so I can make sure it goes back in the right orientation:  Removed the shift drum:  Carefully remove the gear sets, keeping track of what went where:   
|
|
#33
05-07-2016, 01:29 PM
|
|||
|
|||
|
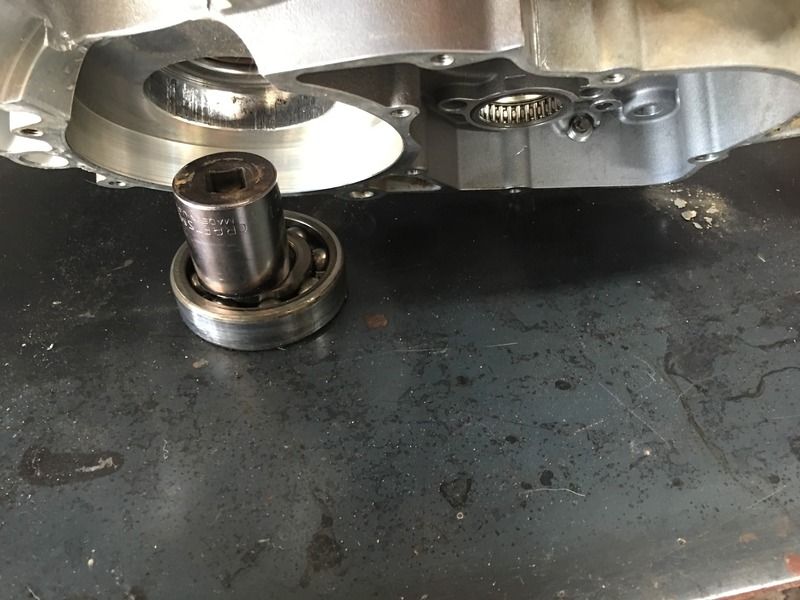
Remove the crank seals:
 On the other half, remove the spacer, and remove the seal:  
|
|
#34
05-07-2016, 01:32 PM
|
|||
|
|||
|
Remove the seal for the primary shaft. There are 2 o-rings. One inside the spacer and one behind the spacer.

|
|
#35
05-07-2016, 01:38 PM
|
|||
|
|||
|
Time to clean it all up:
 Removing the crank bearings: I started by removing all of the alignment dowels to let the case half sit flat. I used a large socket (1 1/16") to drive out the bearing:   For the other side, I used a flat screwdriver inside the edge of the outer bearing race and drove it out. The bearing cage broke leaving just the outer race. I applied a little heat to help it release.  
|
|
#36
05-07-2016, 01:41 PM
|
|||
|
|||
|
To help identify when it was last rebuilt, I etched in the date near the original factory etching. Maybe this will help some future owner... who knows.

|
|
#38
05-07-2016, 08:09 PM
|
|||
|
|||
|
The pic looks worse than it is. Smooth to the fingernail.
I used heat on the other side, where there is nothing to hit, but it still took some persuasion.
|
|
#39
05-07-2016, 08:30 PM
|
|||
|
|||
|
Since there are no raised edges, the new bearing should still drop right in. No ball or rotating surface will ever touch that surface... I'm not losing any sleep over it.
|
|
#40
05-07-2016, 08:55 PM
|
|||
|
|||
|
Looks like your doing a nice rebuild, Jakobi makes a good point about heating the cases. Use an oven or a hot plate. The bearings will drop right out. Freeze the new bearings. When you put it back together, reheat the cases, and drop the frozen bearings right in, no tools required.
Ill be doing a full rebuild here in a couple weeks, i may use your pics instead of the manual, nice write up.
|
 |
|
|
 Similar Threads
|
||||
| Thread | Thread Starter | Forum | Replies | Last Post |
| Complete 2002 ec300 rebuild/conversion | astout93v | General Discussions & Announcements | 1 | 12-07-2014 12:58 PM |
| S3 Race Custom Modified EC250 Complete Rebuild | Jakobi | Enduro Engine - 2 stroke | 173 | 06-23-2014 03:12 AM |
| 2011 ec250 engine complete 70hrs | roverhybrids | Parts | 3 | 01-16-2014 08:20 PM |


 Linear Mode

