


By Matt Roessle
Reference Pictures:
Here are some reference pictures to show the different components. The teardown and installation procedures will be discussed next.
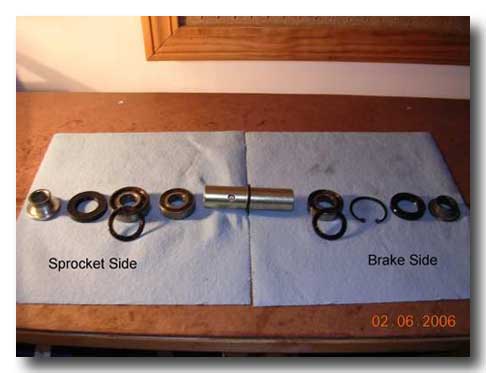
Photo 1 : Exploded View of the Rear Wheel Bearing Assy
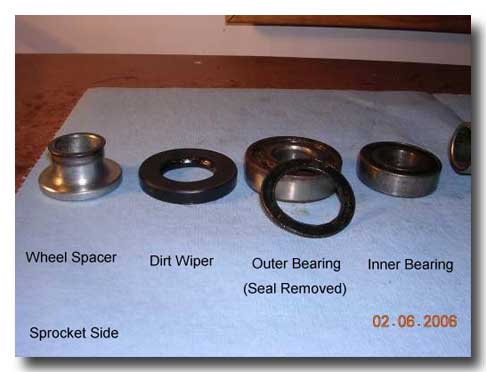
Photo 2 : Close Up View of the sprocket side Wheel Bearing Assy
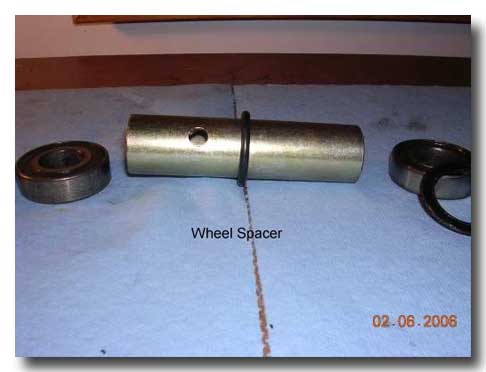
Photo 3 : Close-up of Inner Wheel Spacer
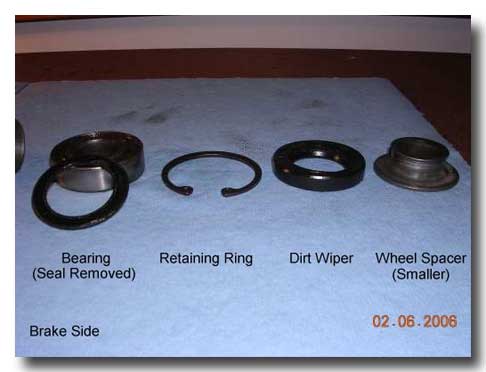
Photo 4 : Close Up View of the Brake Side Wheel Bearing Assembly
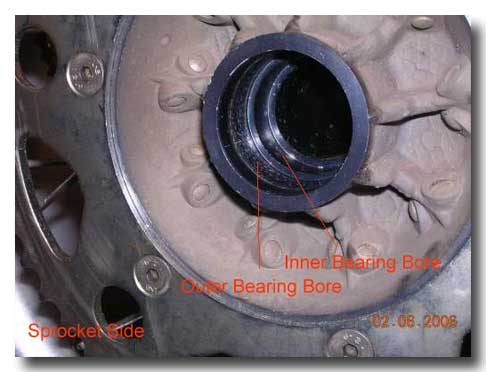
Photo 5 : Close up view of the sprocket side hub with the double counter-bore. The diameter of the inner bearing is smaller than the diameter of the outer bearing.
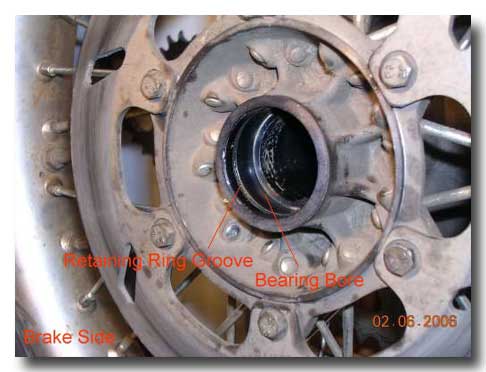
Photo 6 : Close up view of the brake side of the hub. Note that there is an internal groove for the retaining ring.
Teardown Procedure:
Brake Side Wheel Bearing:
- Remove the brake side wheel spacer.
- Pry out the dirt wiper with a screw driver.
- Remove the retaining ring.
- Heat the hub/bearing area with a propane torch (for several minutes).
- Insert a long drift from the sprocket side and feel for the inner bearing edge (very little).
- Using a hammer, hit the long drift and gradually work from side-to-side around the bearing.
- Note: if it does not move, heat the hub longer with the torch and repeat.
- After getting the bearing out, remove the inner wheel spacer and flip the wheel over.
Sprocket Side Wheel Bearings:
- Remove the sprocket side wheel spacer.
- Pry out the dirt wiper with a screw driver.
- There is not retaining ring on this side. However, you get the pleasure of removing 2 bearings at the same time.
- Like before, heat the hub/bearing area with a propane torch (for several minutes).
- Insert a long drift from the brake side and put it against the inner bearing edge.
- This time there will be easy access without the inner wheel spacer.
- Using a hammer, hit the long drift and gradually work from side-to-side around the bearing.
- Note: if it does not move, heat the hub longer with the torch and repeat.
Installation Procedure:
Basically, it is the reverse procedure. You will start with the sprocket side and install these bearings first.
Recommended Tips:
- Before installing the new bearings, inspect them to make sure they are fully greased.
- Gently remove the bearing seals with a small screwdriver or pick.
- Using a good waterproof grease (like Bel-Ray), brush in a liberal amount into both sides of the bearings.
- Reinstall all bearing seals.
- Put all of the bearings into a plastic bag and put them in the freezer for about a hour prior to installation.
- The combination of frozen bearings and heated hub will make the installation easier.
Sprocket Side Wheel Bearings:
- Heat up the hub/bearing area with a propane torch (for several minutes).
- Select sockets or washers that contact only the outer bearing races.
- Hammer in the inner bearing until it is fully seated.
- Hammer in the outer bearing until it is fully seated against the inner bearing.
- Apply some grease to the inside of the dirt wiper.
- Press in the dirt wiper.
- Press in the outer wheel spacer.
- Now, flip the wheel over to do the brake side.
Brake Side Wheel Bearing:
- Heat up the hub/bearing area with a propane torch (for several minutes).
- Insert the inner wheel spacer (DO NOT FORGET TO DO THIS!!!)
- Using a socket or washer like before, hammer in the bearing until it is fully seated.
- Did you remember to put the inner wheel spacer in?
- If you forgot… you will have to hammer out your new bearing using the long drift like during teardown.
- If you are quick enough and the hub is still hot, the bearing can be removed without damaging the inner race… if you are lucky!
- After the bearing is fully seated, install the retaining ring and make sure it is in the groove.
- Apply some grease to the inside of the dirt wiper.
- Press in the dirt wiper.
- Press in the outer wheel spacer.
- Note: the brake side wheel spacer is the shorter/smaller spacer and the sprocket side wheel spacer is the taller/larger spacer.

copyright 2006 - gasgasrider.org